
Is it attainable nobody ever taught you to separate milk? That’s about to alter. On this submit we’re going to show you the artwork of dividing up a pitcher stuffed with steamed milk in such a approach that you find yourself with the identical quantity of froth in every beverage you pour. And judging by what we noticed after visiting an awesome many extremely rated cafés throughout Europe on our latest journey to World of Espresso, this observe could be very a lot a misplaced artwork within the specialty espresso scene. Don’t assume know-how will spare you the difficulty of studying this talent within the foreseeable future. Based mostly on our observations in Switzerland and the UK, it’s very a lot not the norm for cafés to be utilizing autofoamers like La Marzocco’s Wally Milk or an Ubermilk. That’s as a result of, while being fairly sensible know-how, they price virtually as a lot as an espresso machine (+AUD10K) and, it ought to be mentioned, because of the ‘latent warmth of condensation’, the steam wand is fairly rattling environment friendly at heating milk.
I’ve received a fairly good idea on why milk splitting is so seldom seen in cafés now. In 2016, the World Barista Championship made some dramatic modifications to the foundations and made technical judges into little greater than hygiene screens. They eliminated virtually all the eye they as soon as positioned on technical and changed it with a really sturdy emphasis on flavour. That’s very good, however baristas within the WBC had been as soon as exemplars of greatest observe in café service. Nonetheless, that’s definitely not the case. In the event you take a look at the foundations and regs for the WBC now, the solitary technical choose (there was two) checks very rigorously if the steam wand is wiped and purged, and between them, the sensory and technical judges do virtually nothing else to guage the technical talent of the barista, aside from checking in the event that they spill a little bit of espresso. (In the event you occur to be in search of a method of testing your technical talent as a barista, strive this.)
Sensory judges used to guage foam depth by pushing the again of a teaspoon via the froth, which positive seems to be quaint today, and if there was lower than 10 mm of froth, they’d every dock you a degree on their sensory rating sheet. The factor is, while sensory judges at the moment are educated to give attention to “harmonious balance of the sweetness of the milk and its espresso base”, to quote the rules and regs from the WBC, do you know who actually still pushes a spoon through their milk beverage? Virtually every customer you provide with a cup and spoon, i.e., all your dine-in customers. Of course, if you whack a lid on a take-away cup, the excess of foam or an absolute dearth of it may escape notice, but any dine-in customer will notice and care if you have got inconsistencies in the way you foam your milk. If you sell a customer a blueberry muffin one day and it has a dozen blueberries in it — and then the next day, they come back and order a muffin with only two… they’re going to notice, right? It’s the same with foam. Absolutely no one likes spilling an under textured milk-based beverage all over their saucer.
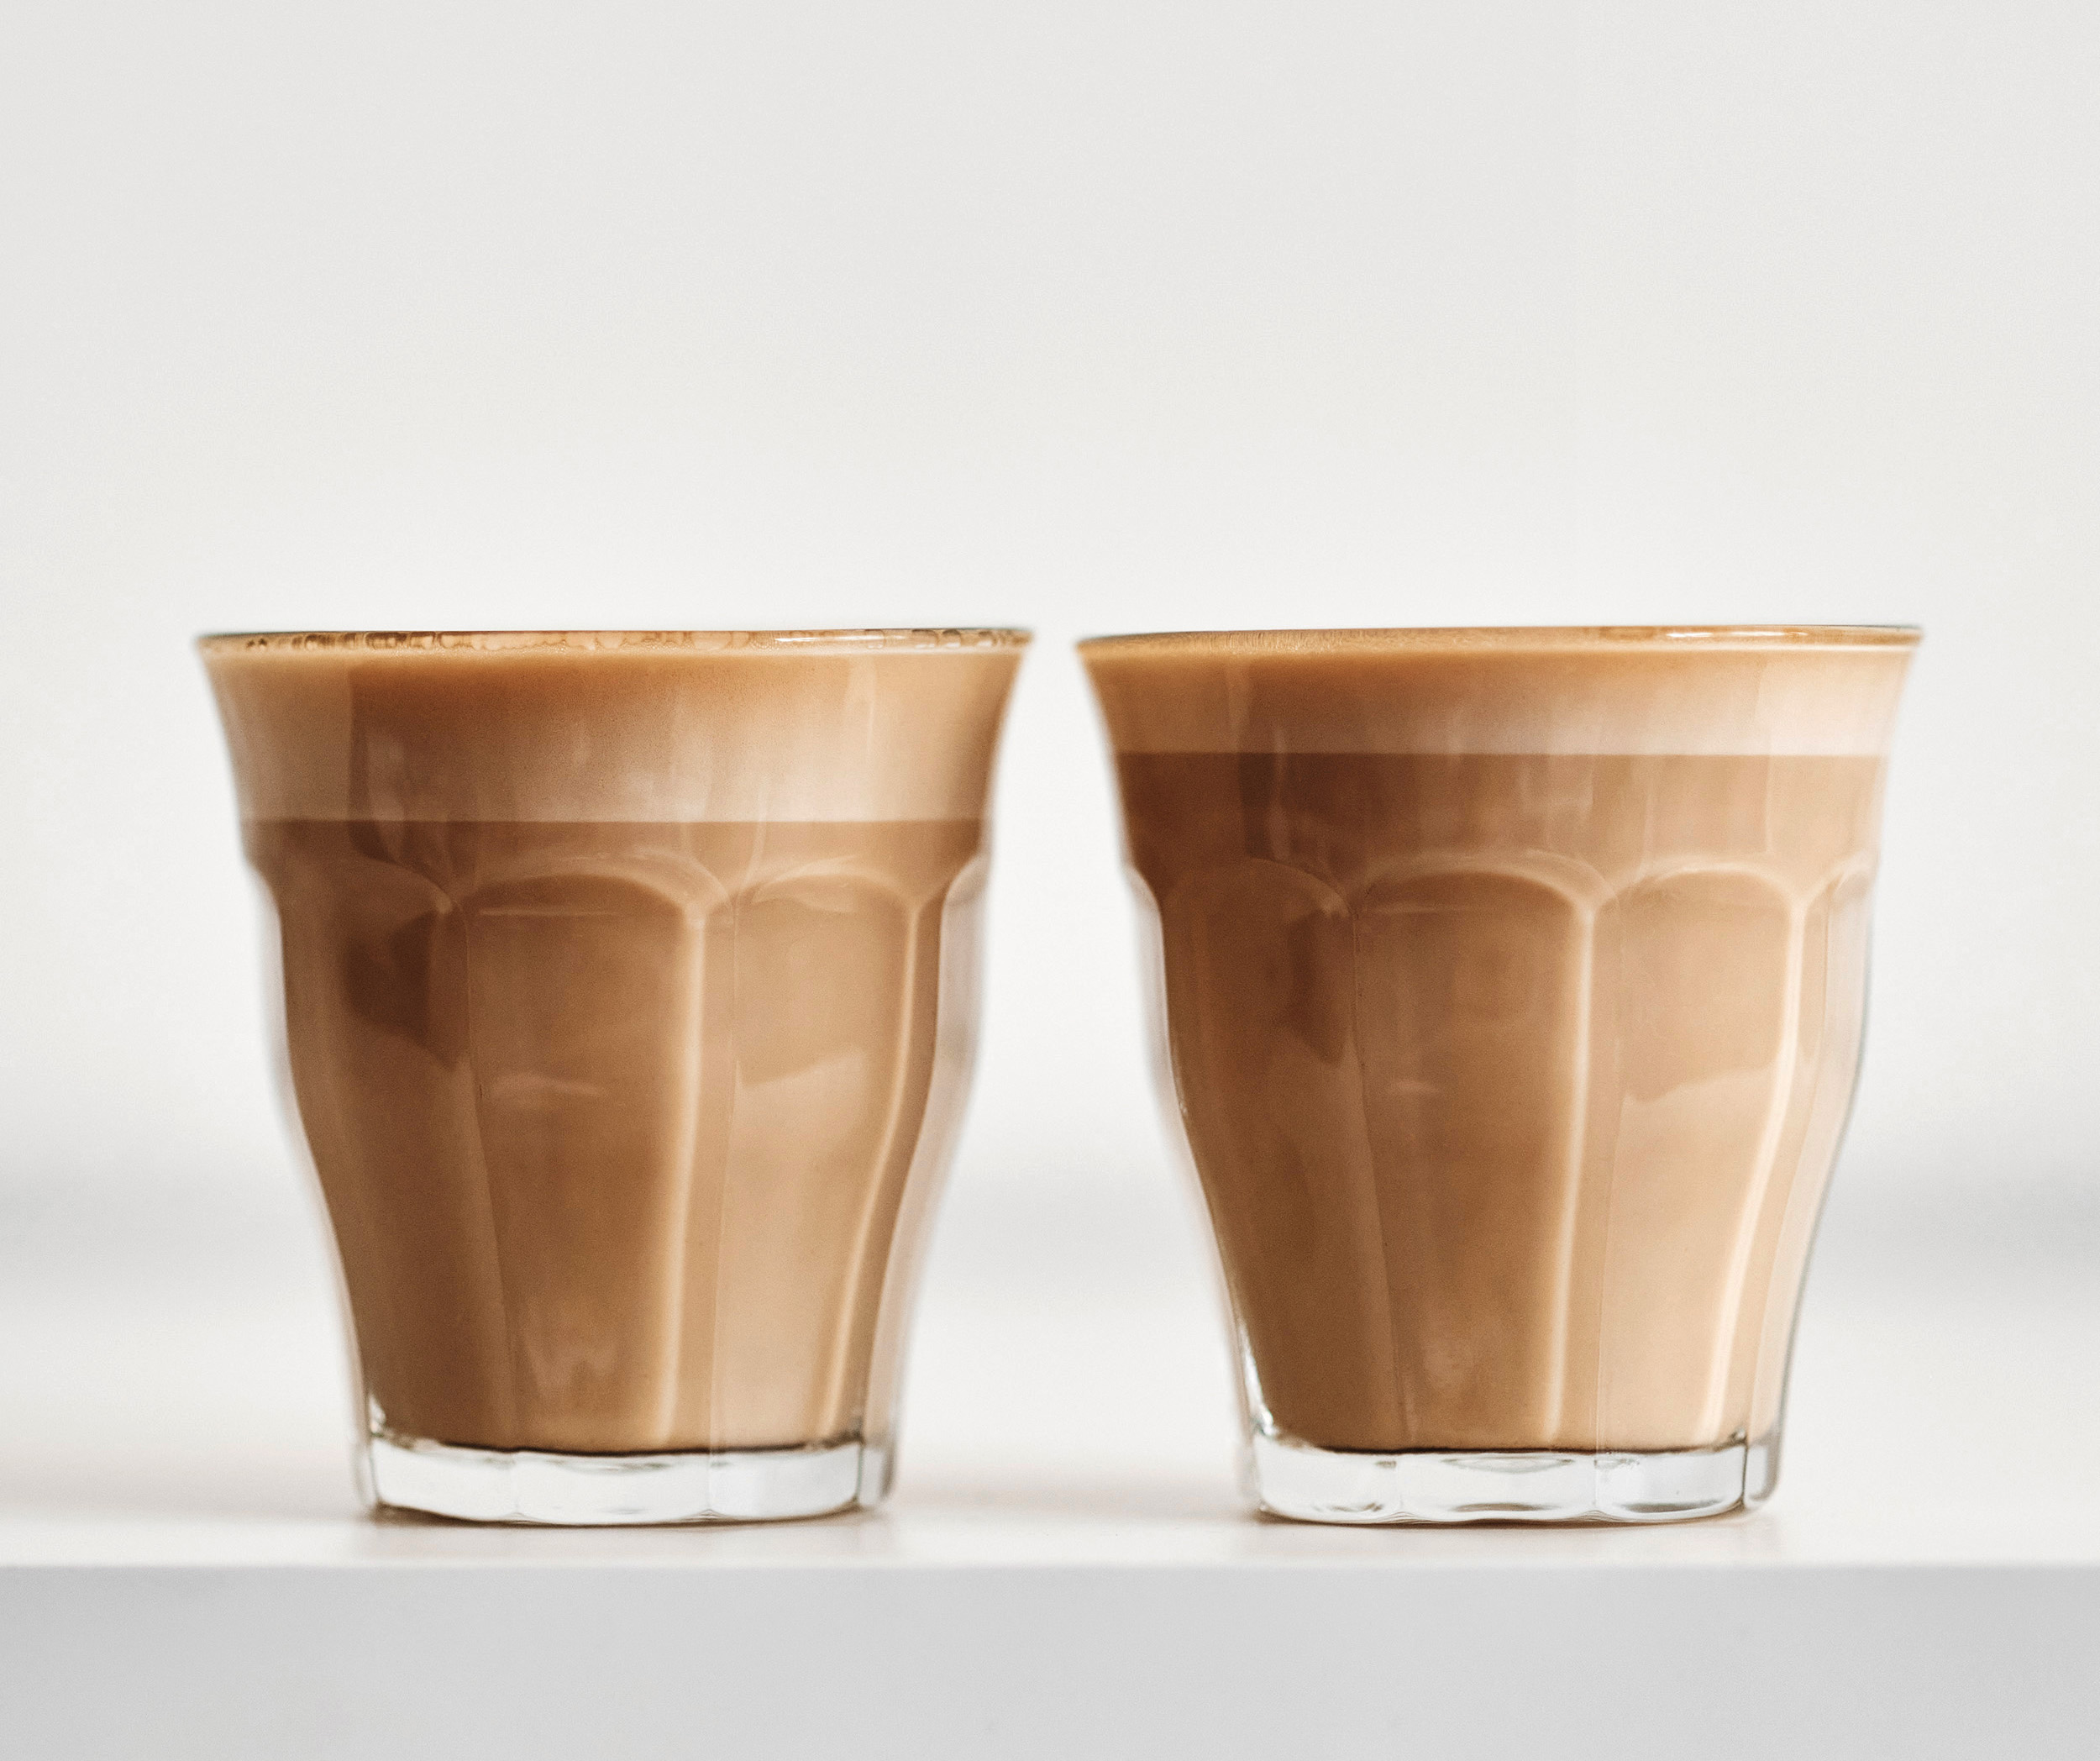
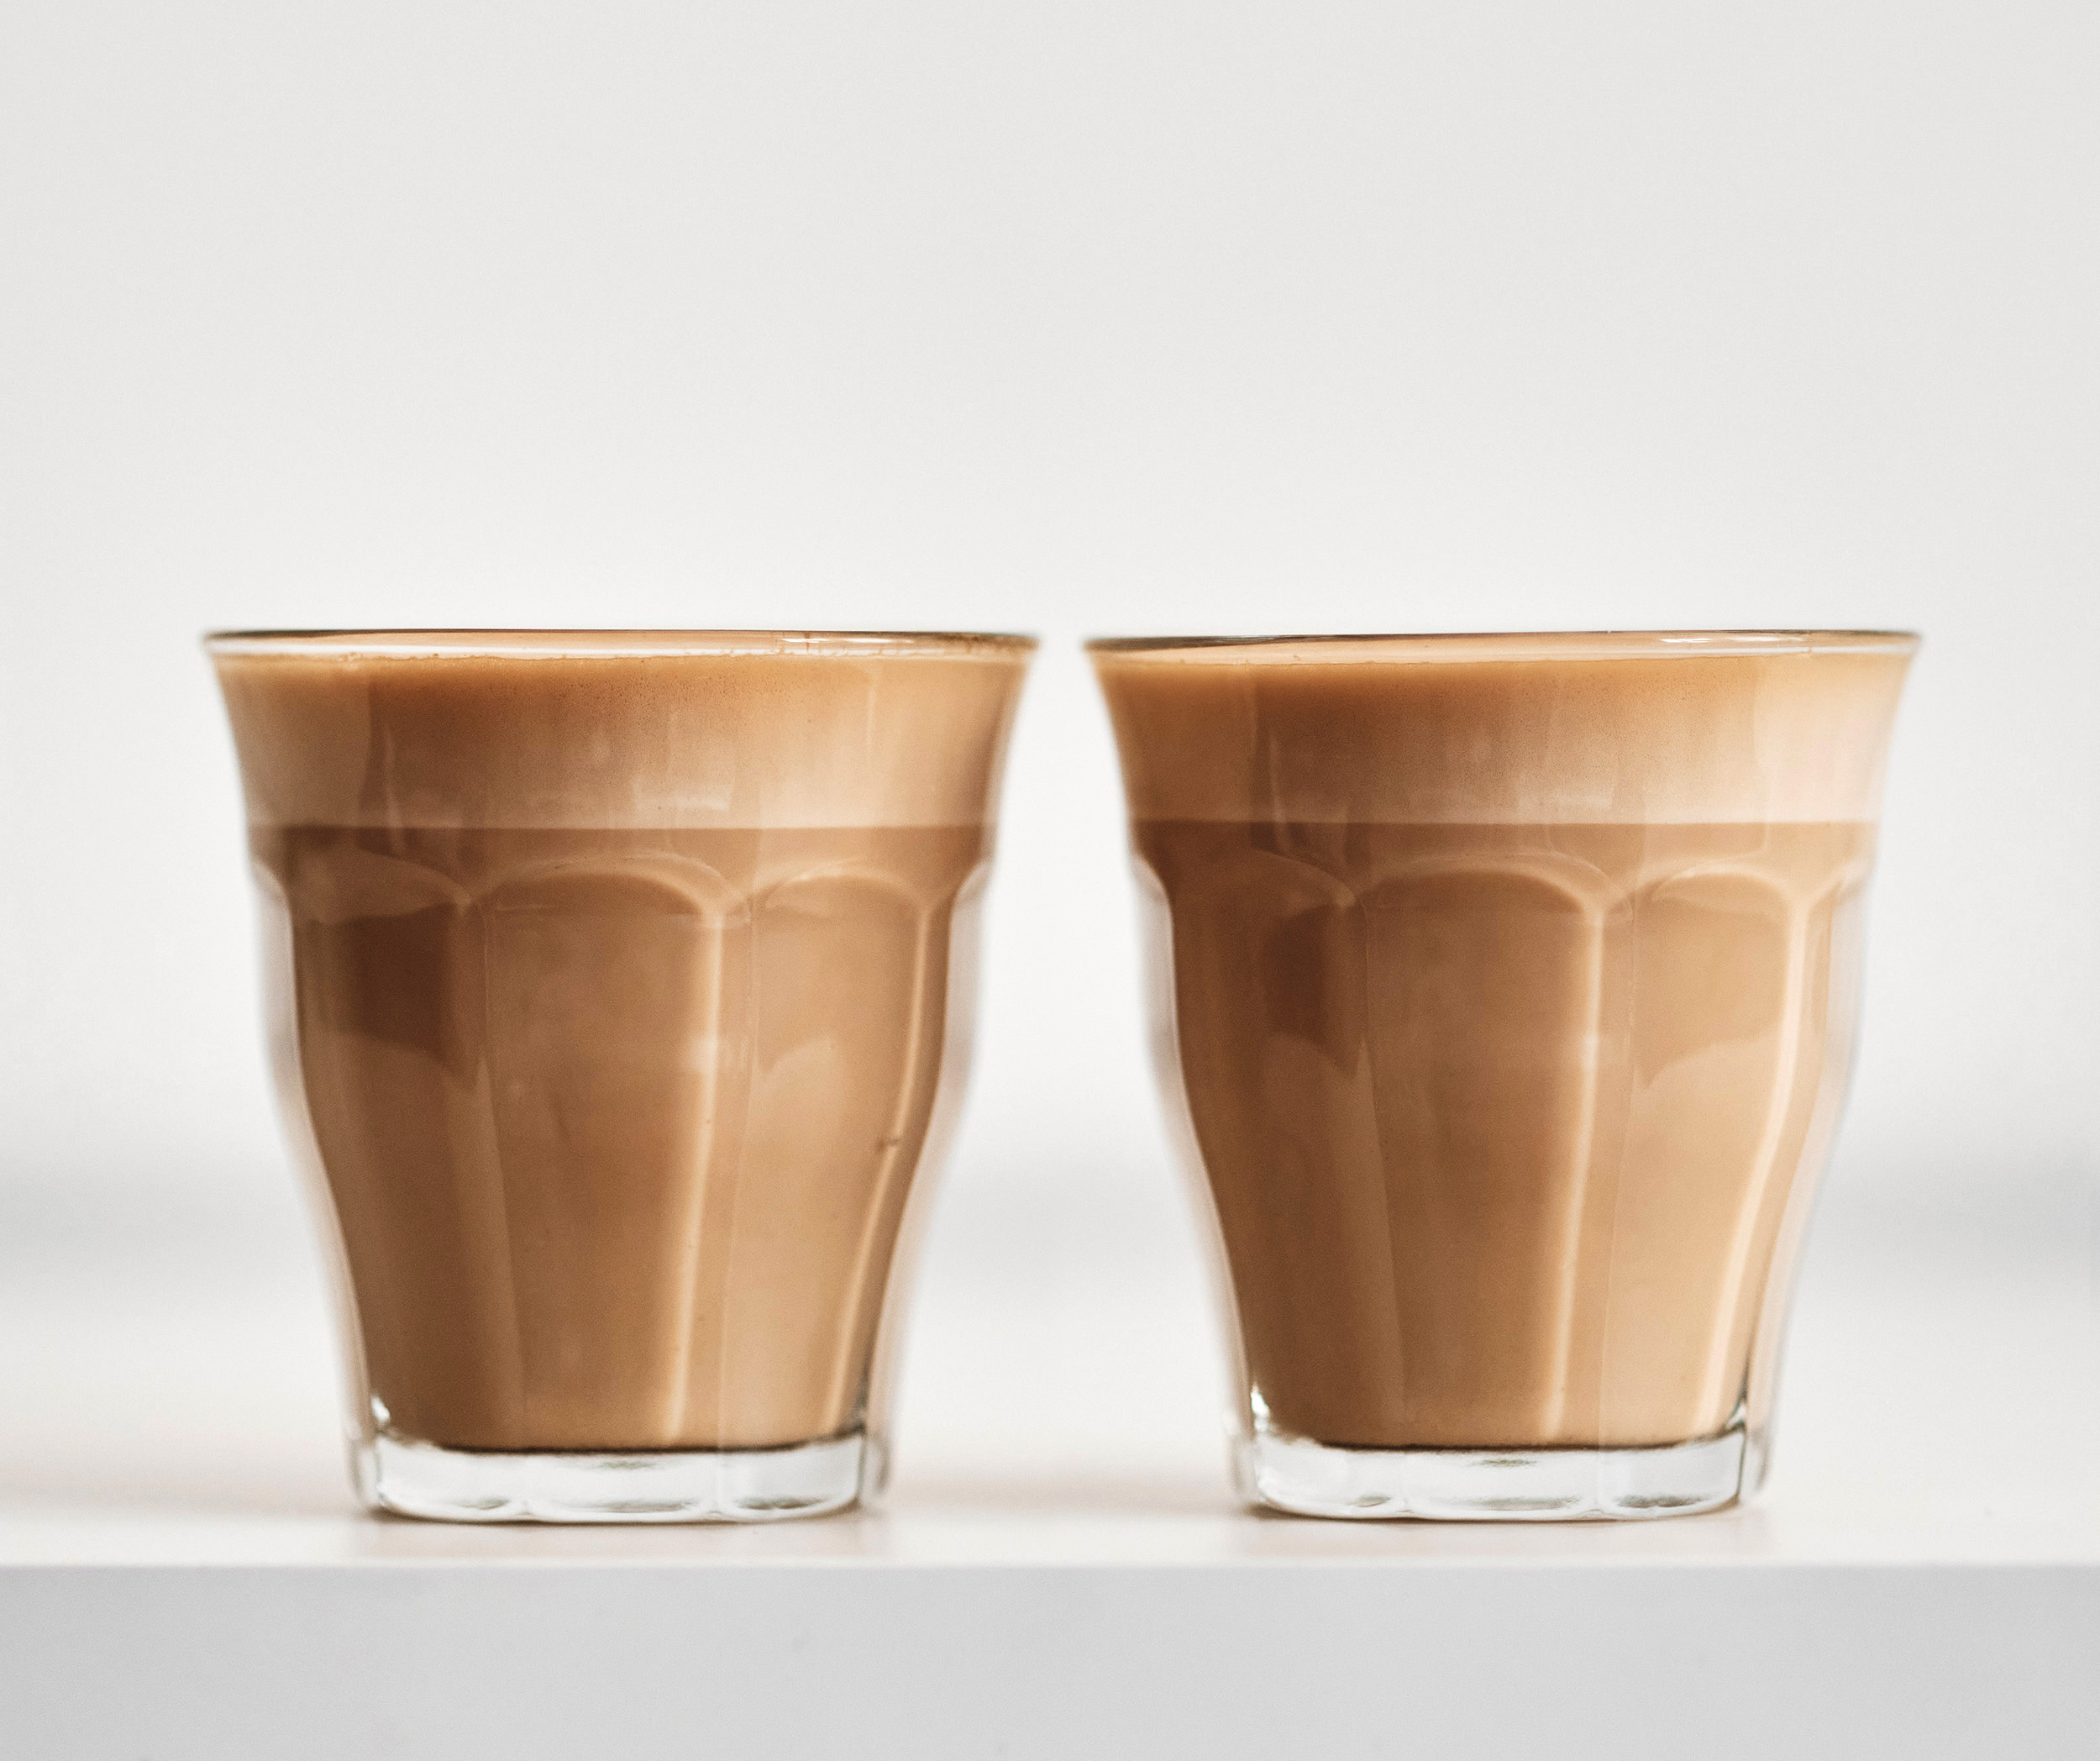
And what if you have two customers who order two lattes in glasses? If you don’t split the milk and you just pour the top half of the milk pitcher into the first latte and the bottom of the milk into the second latte, they’re gonna come out looking like this:
Here’s how to get them both looking and tasting the same. This is how we teach you to split your milk in our flagship course Barista One.
This method requires two milk pitchers: a larger one for steaming and a smaller one for pouring. Follow this protocol every time you’re making two drinks at a time:
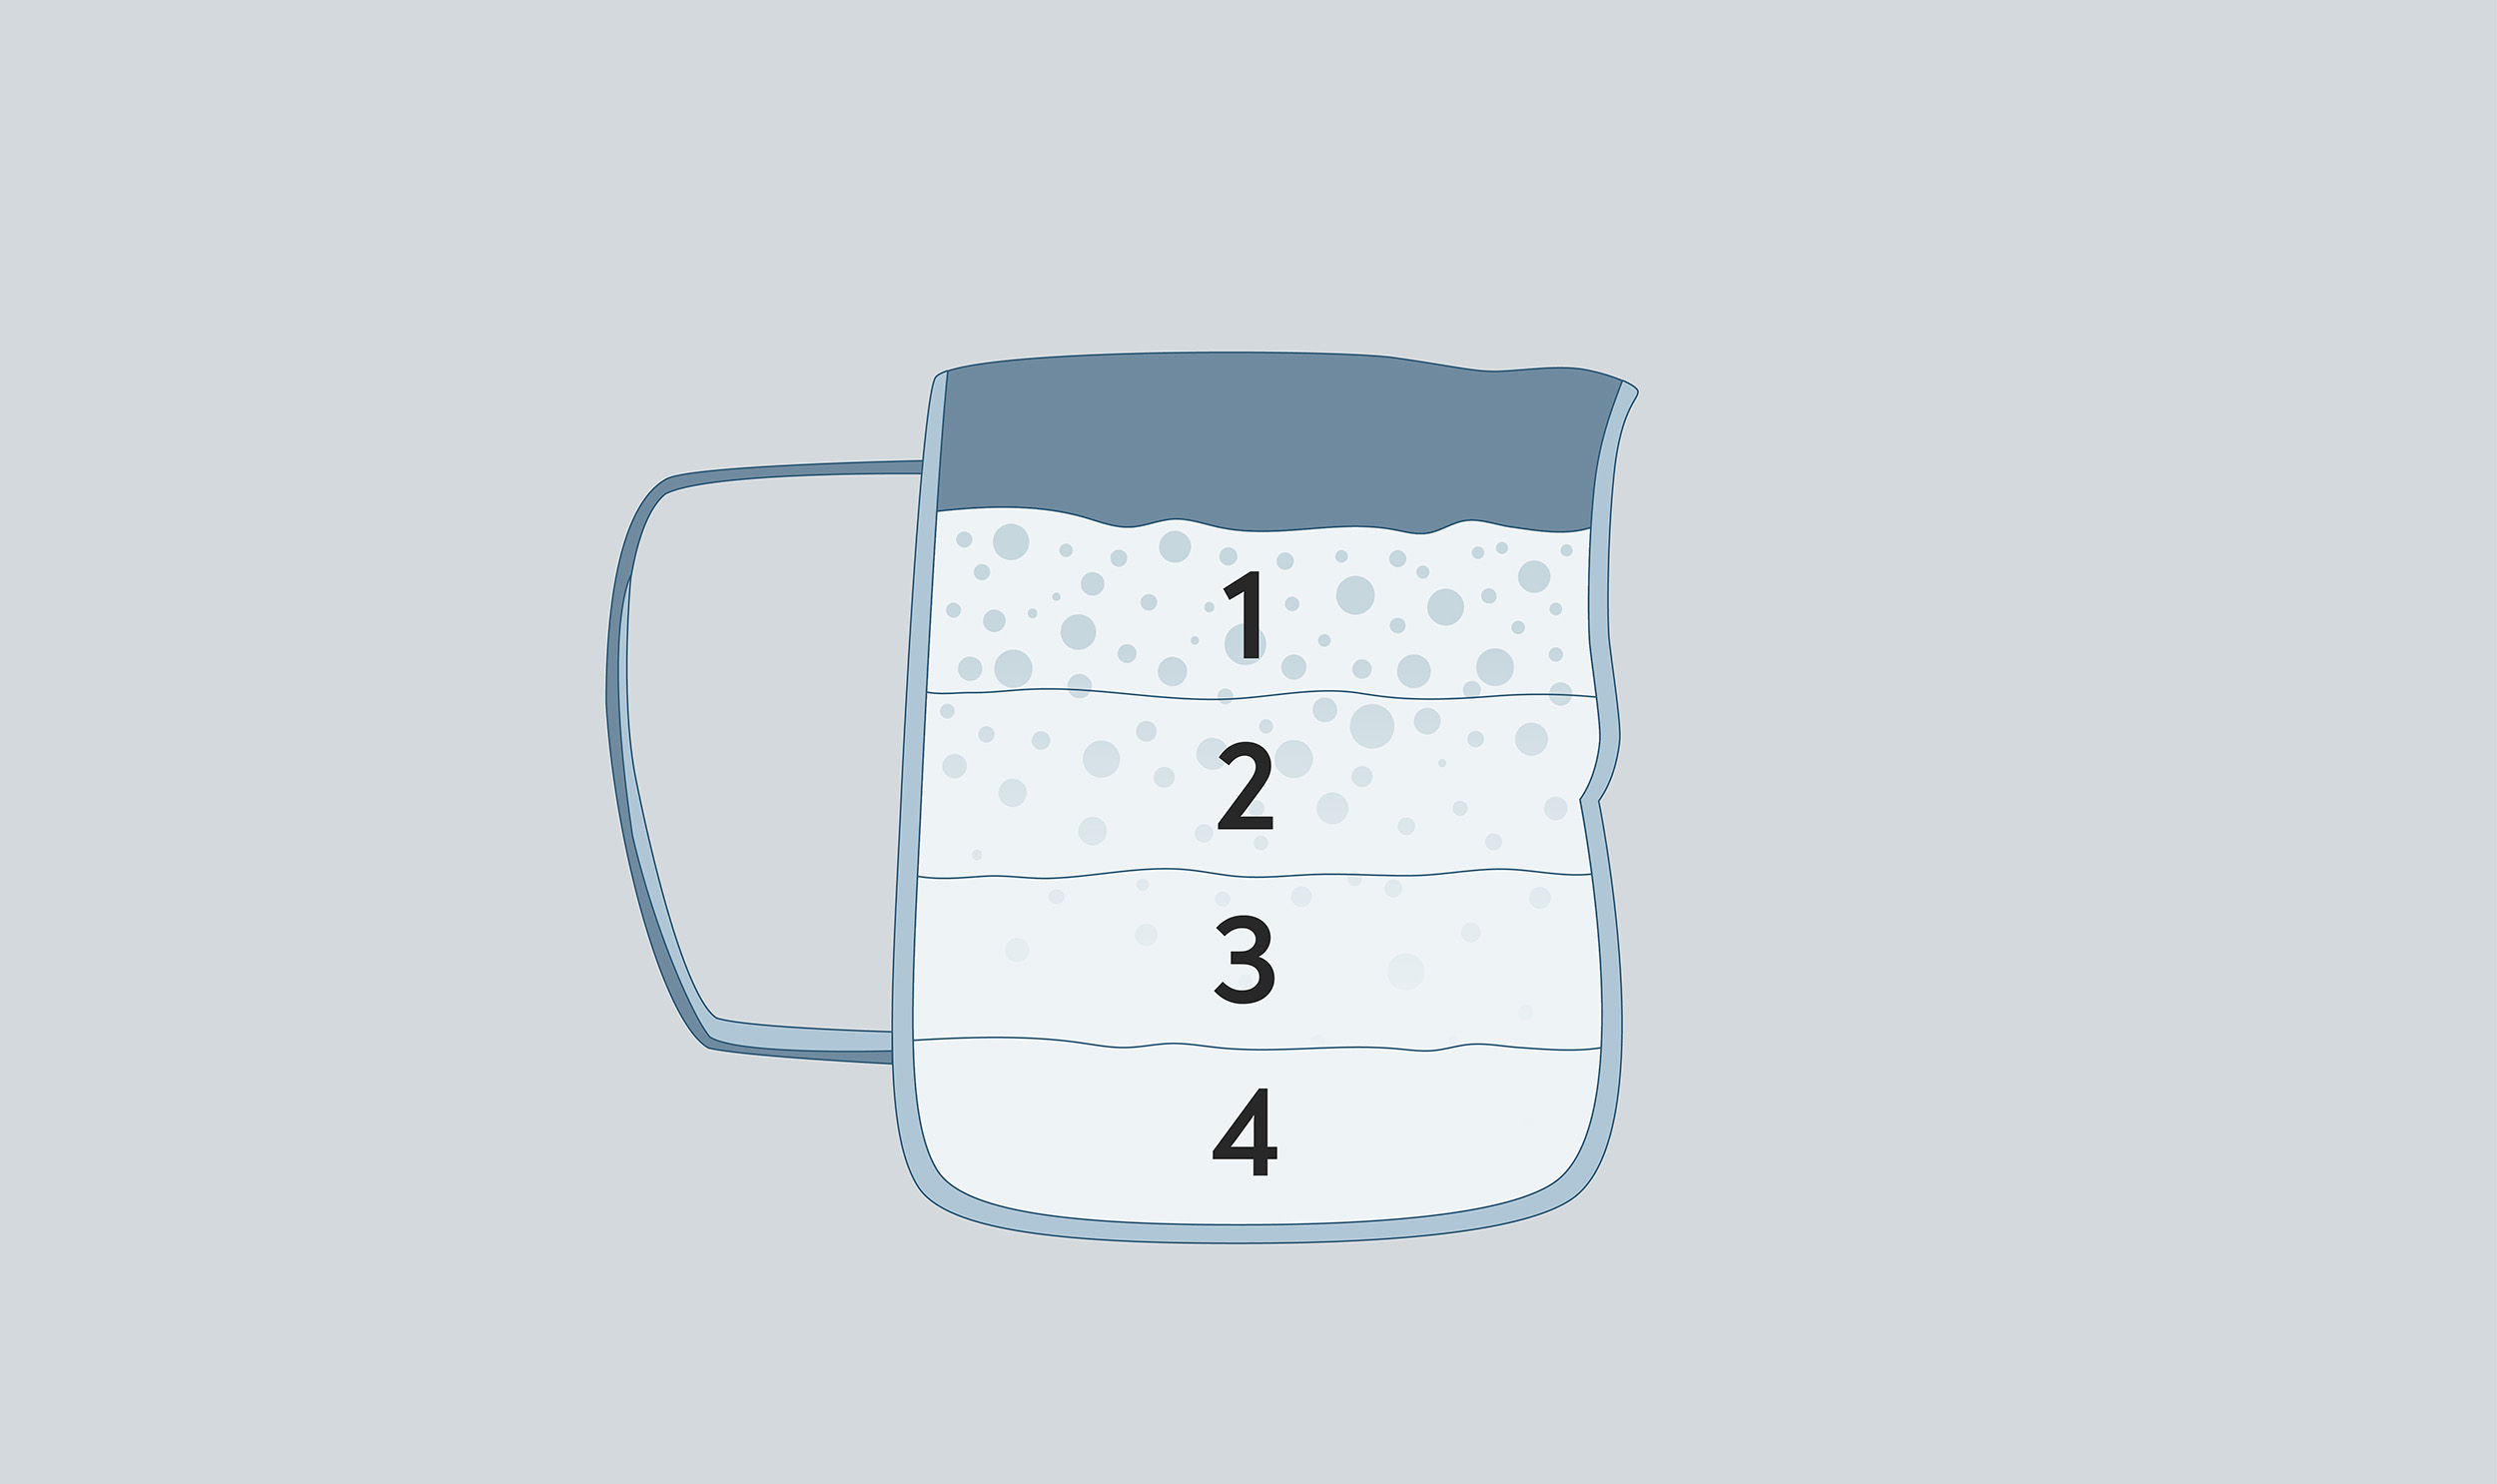 1: Mentally divide the milk into four separate sections.
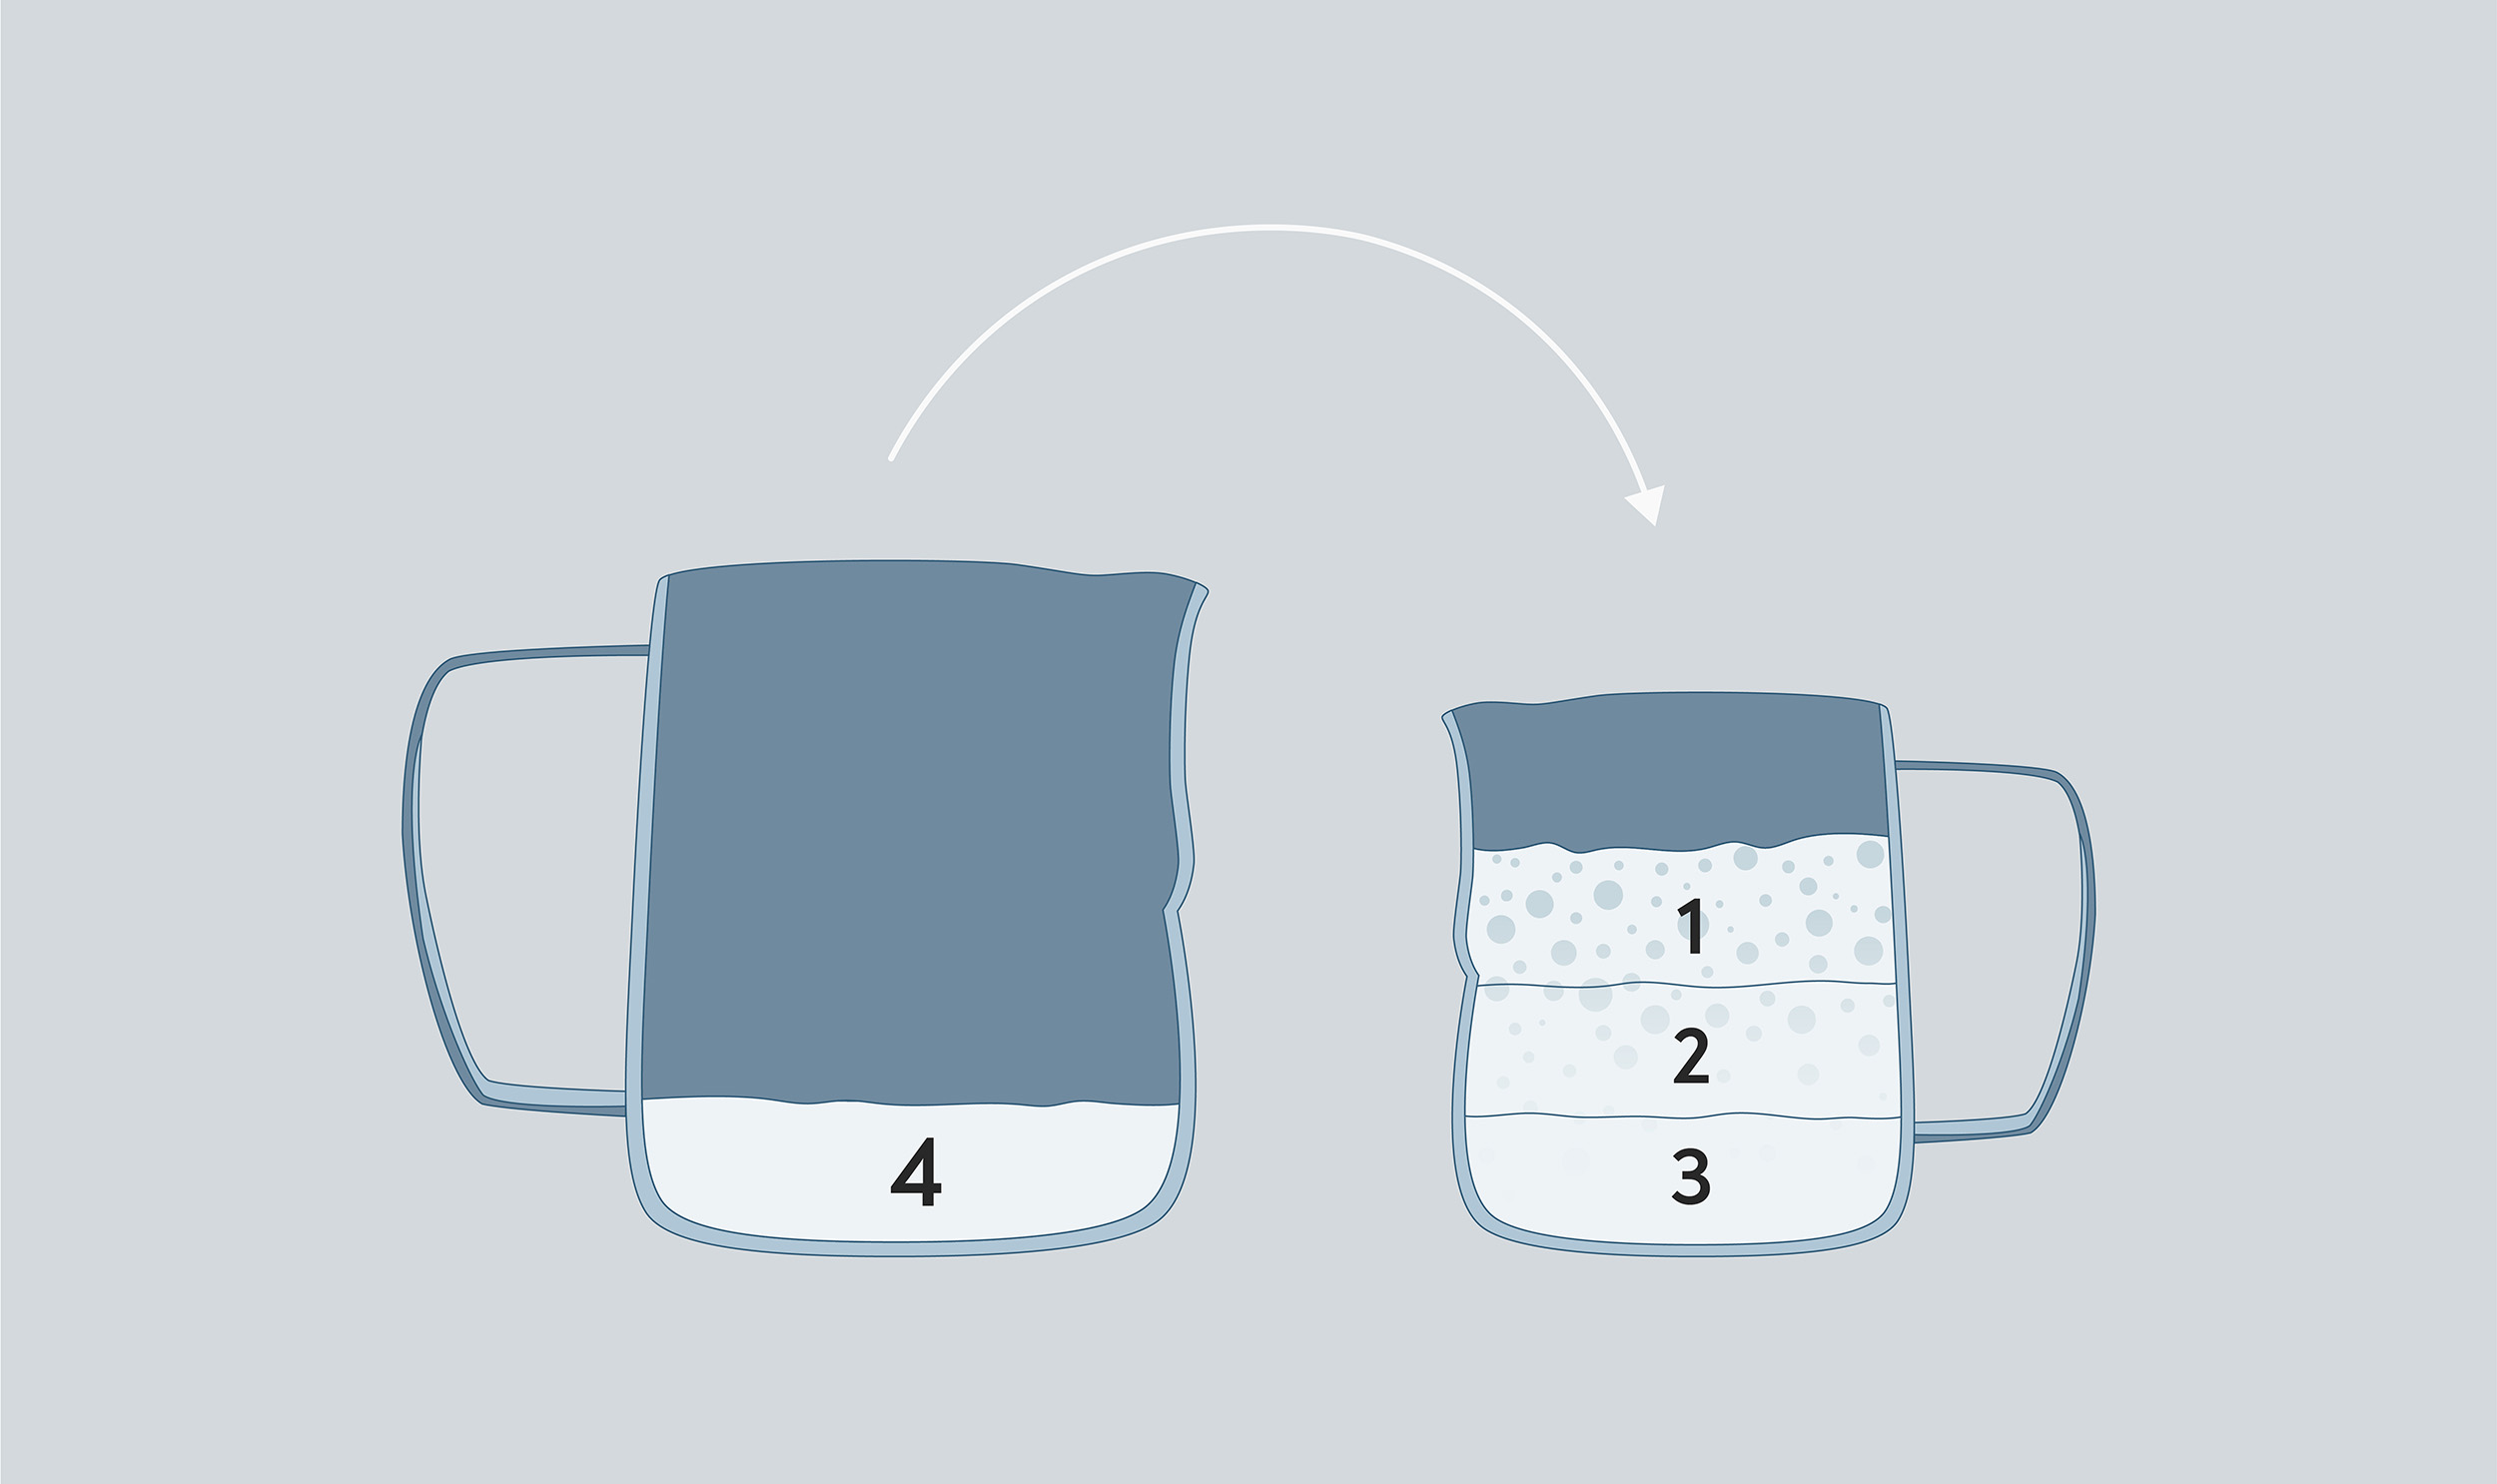 2: Pour three-quarters of your freshly steamed milk into the smaller pitcher. This will pour out most of the air bubbles into the smaller pitcher, leaving the least foamy quarter behind in the larger pitcher.
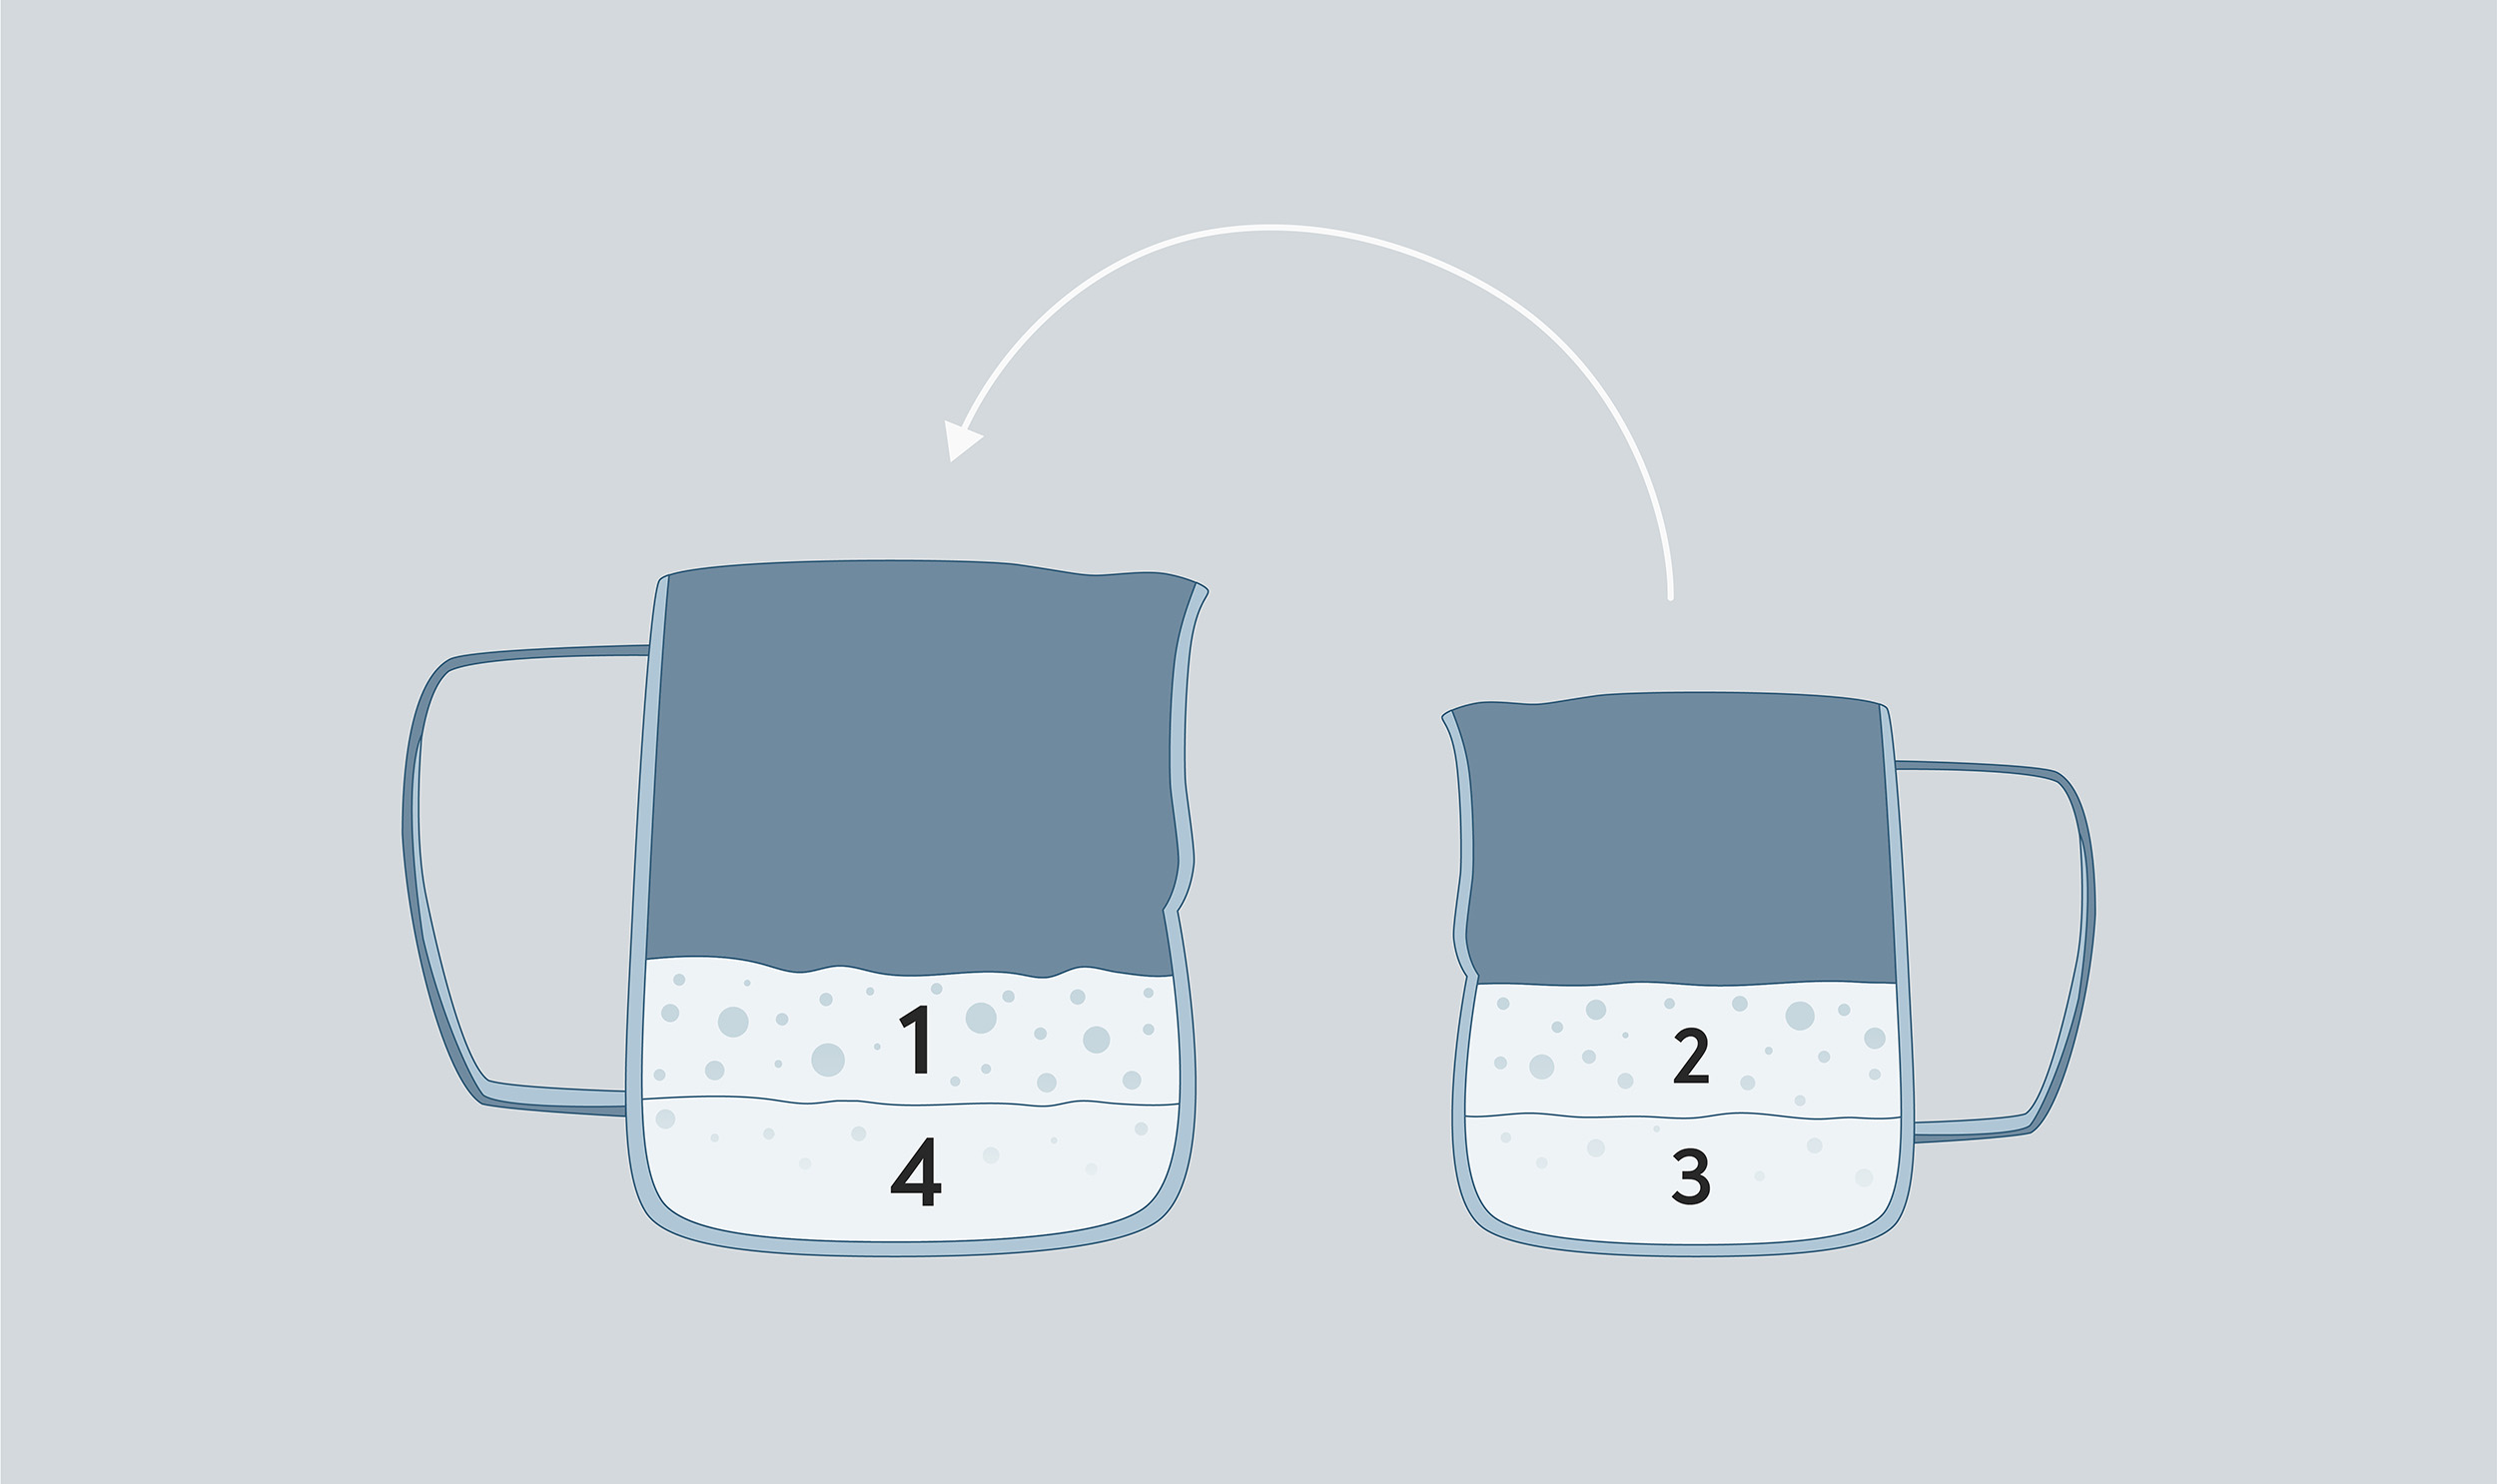 3: Return one of those quarters back to the larger pitcher. This has the effect of returning the foamiest quarter to the larger pitcher.
 After pouring your lattes, the foam will be equally divided like this.
Your Latte Art Needs You to Split, Too
If you are into latte art and you’ve been noticing some inconsistencies, then milk splitting will dramatically improve your latte art, too. If you try to pour a pattern with milk that is drawn from the top of a pitcher, i.e., parts 1 and 2 from the diagram, then you will notice you are really limited in the designs you can pour because almost certainly your milk will be too foamy. The most you can hope for is a heart or a very rudimentary tulip with very few petals.
Similarly, if you pour a pattern with parts 3 and 4, the milk will be really thin and under-aerated. Drainage will take place much more quickly and your designs will slip across the surface of the milk and each component of your design will look thin.
When the bubbles in a freshly poured latte appear to be falling down instead of floating up, what you are actually seeing is liquid draining out of the bubbles. This is due to the process of drainage. If you’ve ever ordered a pint of Guinness or a stout beer, you will have seen very well what drainage looks like.
From a taster’s sensory perspective, slow draining can be very pleasant, imparting a velvety texture. From a practical, latte art perspective, the 10-second rule is something to aim for, that is, begin pouring in no longer than 10 seconds after steaming is finished. Otherwise, the drainage of your foam will have advanced too far and your milk will separate into a liquid layer and a dry foam layer.
And when you’re doing two drinks at a time — which you should in a café where possible, because it’s so much faster than steaming individually — then you need to begin splitting your milk within ten seconds of steaming, before too much drainage has taken place.
Foams can be stiff, runny, or some form in-between. In physics terminology, these qualities are called either ‘elasticity’ or ‘plasticity’. What changes along this continuum from stiff to runny is the amount of elastic and plastic strain. After a material reaches its yield point, it no longer just flexes; it elongates (plastically) and begins to be permanently deformed. The level of stress needed to trigger this change is the yield stress. For good latte foams, we want a low yield stress.
Around 60 seconds after steaming has finished, the yield stress of the milk increases via the process of drainage. The more that time passes and drainage occurs, the closer your foam gets to being unusably ‘elastic’. You have seen baristas spinning milk jugs to create a whirlpool before they pour. This process is not strictly necessary if you steam and pour immediately, but if there is a delay in your workflow, such spinning can help to restore milk back into a usable condition. If, perhaps, you steamed enough milk for two drinks, and the milk for the second drink has been set aside for some time, then it is necessary to undo the drainage process. Spinning your milk jug around or transferring your milk into a new jug will restore the liquid around the bubbles and will take your foam further from the yield point, to ensure your bubbles can slide past each other again. The term in surfactant science for how readily bubbles can slide past each other is their sliding friction.
If you want to follow up on your milk science, or advance your knowledge of latte art further, then check out for these two online courses and certifications — Milk Science, and Latte Art, both included in our monthly BH Education subscription.

